Build your own actions
This article is meant for developers or advanced users with programming skills.
What is a custom action ?
In CoolTweak world, a custom action is just running a script or an executable providing it some parameters.
This action is refered to as a command.
By default, CoolTweak launches the command with its parameters, waits for the associated process to end and then continues with the next action.
For sure, there are several options to control this mecanism (which parameters to give ? Should we wait, if yes how long ? Do we have to reload the file after the processing ?) but the principle is yet very simple.
What about tech ?
Supported scripts are DOS scripts (batch), VBScript and Powershell scripts.
CoolTweak also enables to call any executable file (exe or other) and to provide it some parameters.
This wide supported technologies range allows you to code in your favorite language and to be able to call third party libraries easily too (like ImageMagick ou ffmpeg to just mention them).
There are two types of commands
Both of them can run a script/executable file but the former allows to run the action just once providing all files as a parameter, the later allows to run the action once per file, providing a specific file path.
Event commands
Event commands are just launched once before the actual processing starts and/or once after the actual processing ends.
You can provide the whole list of files to be processed (before processing) or processed files (after the processing) to these commands.
They are then useful to achieve processing that require to know about the entire set of files (to build a zip, create an animated gif, upload processed files to FTP, etc.).
Custom commands
Custom commands just take a single file as parameter and are executed in parallel for each file during CoolTweak main processing step.
The command is launched on each file to process and it is possible to chain many of them.
They are meant for processing a file at a time, without having the knowledge of the rest of the files to process.
Lifecycle of a processing
The illustration below describes the major steps when CoolTweak processes files.
event
(custom commands)
event
- The processing is launched on a set of files.
- If defined, the event command "Before the processing" is executed, it take the whole file to process list as a parameter.
-
Since then, the main processing part starts, each file processing is run in parallel (several files at a time).
This is at this moment that custom commands may be executed on each files.
Before the first action, a copy of the current file is made. It is a temporary work file.
This copy is provided to each action and each action can modify its content before submitting it to the next action. -
When all actions are achieved on a file, the temporary work file is moved and renamed depending on the selected output options.
By default, it will be dropped in a "Cooltweak" folder with the same name as the original file. -
When all files are processed, the event command "After the processing" is executed if defined.
It takes all processed files as a parameter (the processed files are already at their final location at this point). - After this command ends, all processing is considered finished by CoolTweak and it shuts down.
All about custom commands
Custom commands perform processing on a particular file.
In this section, we'll see how to create a custom command and how to configure its options.
Creating a custom command step by step
Launch CoolTweak menu editor by right clicking any of your files or folders and selecting the "Customize my actions" menu.

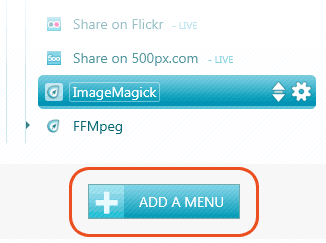
Once the menu editor is visible, create a new menu by clicking the "Add a menu" button, under the list of all your menus.
We could also have added a custom command to an already existing menu but here we're going to create a new one from scratch.
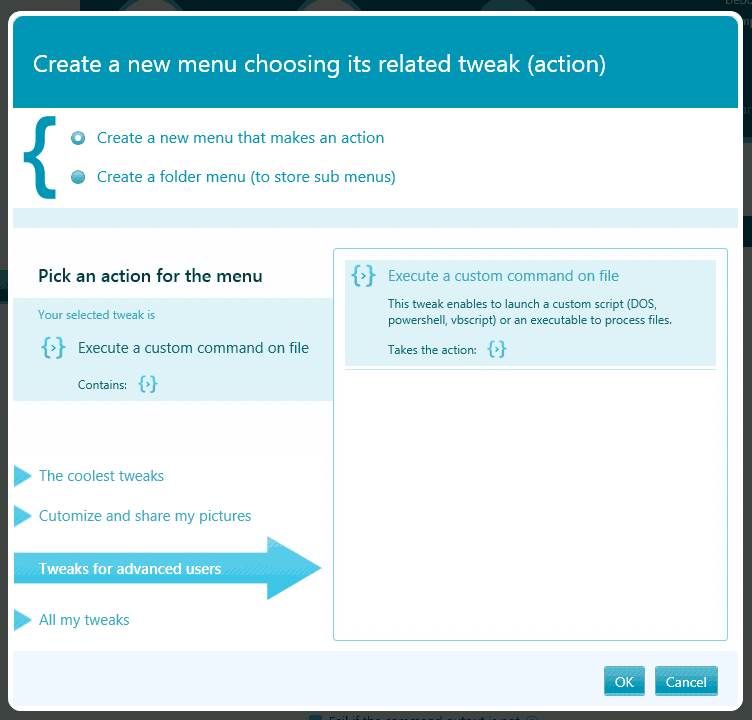
Select the action "Execute a custom command on file" that can be found in the "Tweak for advanced users" category.
Carry on by clicking the OK button, the new menu is immediately created and contains a single action, an empty custom command.
Rename this menu to whatever you want by clicking its default label "New menu"

Configuring custom commands
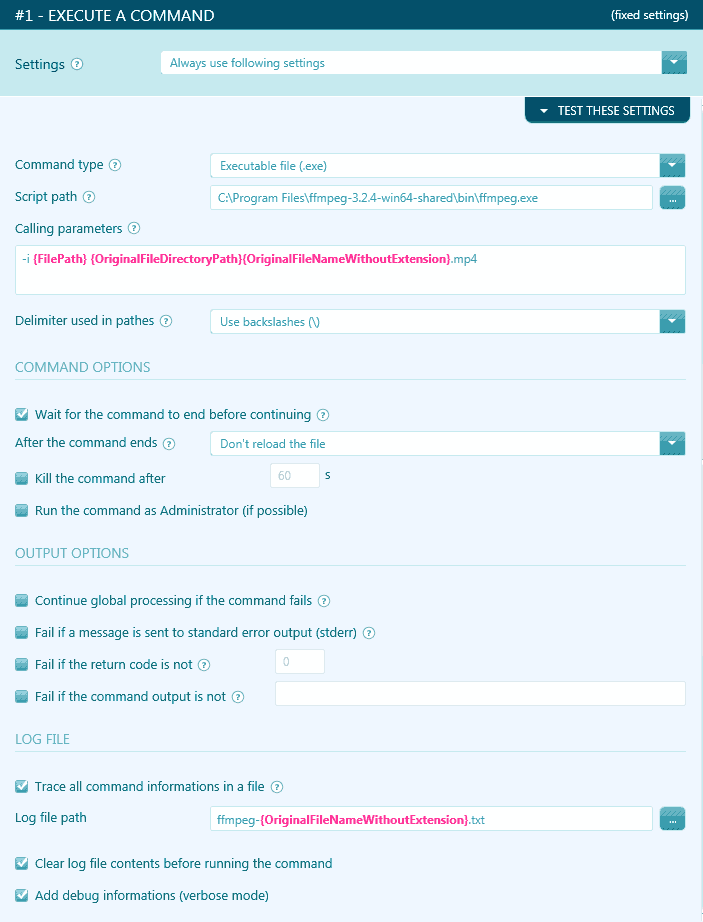
Here are the main configuration options for a custom command
-
Command type
Choose the nature of your command, is it a script (a text file containing instructions) or an executable file (binray file) ?
-
Content to execute
In scripts case, you can choose if their text content is loaded from a external file or if it is directly stored in CoolTweak.
-
Script path
For scripts stored in external file or executables, it is the path to the related file.
For DOS scripts, you can also enter the name of a DOS command such as echo or xcopy for instance.
-
Calling parameters
They are optional parameters that are provided as arguments when calling your script/executable.
These parameters can contain variables with the {MyVariable} syntax and that will be replaced by their actual value at runtime, before the call to the command.
To get the complete list of available variables, just click the field. -
Delimiter used in pathes
It is the option that defines which delimiter will be used to render pathes when they are provided using a variable.
Default option is a backslash representation of path. -
Wait for the command to end before continuing
When this option is checked, CoolTweak waits until the process associated to the command ends before continuing (synchroneous mode).
The opposite is asynchroneous mode in which CoolTweak launches the action and moves immediately to the next action without caring about its progression.Please note that some features (file reloading, command timeout) are just available when command is run in synchroneous mode.
-
File reloading modes
After the command's execution ends, the temporary work file may have been modified, you can then decide if it should be reloaded by CoolTweak (to take the modifications into account) or not.
If you wish, you can reload the file from its current location, from a predefined path (that can contain variables) or from your script/executable output.
-
Output options
By default, your command will be considered as failed if some content is written to the standard error output.
In this case, processing will stop and the global file processing state will be Error.There is an option to ignore the command state (in order to continue even if it failed) and another to ignore the contents sent to the standard error output.
On the contrary, you can make your command fail if it ever returns an unexpected return code or output (on standard output stream).
-
Troubleshooting tools
When developing, you can switch the log feature on to trace precious informations about what is actually happening.
These details can be stored in a single or multiple log files.The log file path can be absolute (all processing will be written inside) or relative and containing variables (a log file will be created for each processed file).
This feature is really helpful to track issues down but to improve your command performances switch it off when your command works fine.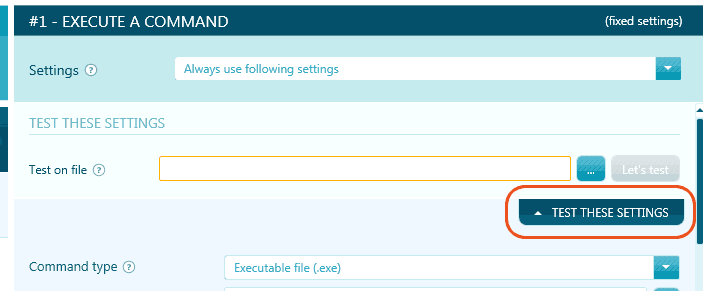
During development, you also can test your command very easily thanks to the "Test these settings" button. Just select a file and validate.
The processing log file will automatically display with all the details and the processed file will also be shown. That's quite handy.
Just save your changes and you're ready to go, you can now call your command on any file or folder with a single right click..
Custom commands variables
The parameters provided to your command are essential because they allow to specify which file to process and other informations about the execution.
CoolTweak offers a large range of predefined variables (also called macros) with the {MyVariable} notation which are replace by their actual value just before running the command.
Click the calling parameters field to display all the available variables.
- {FilePath} Current file path
- {FileName} Current file name
- {FileNameWithoutExtension} Current file name without its extension
- {FileNameExtension} Current file extension (ex: .jpg)
- {FileDirectoryPath} Path of the directory containing current file
- {FileFormat} Current file format
- {FileMimeType} Current file mime type
- {FileMediaType} Current file category
- {FileDefaultExtension} Default extension for current file format (ex: .jpg)
- {FileIndex} File index in global processing (0 based)
- {FileCount} The total number of files to be processed
- {OperationId} Current operation ID
- {OutputFilePath} Final file path (after all processing)
- {OutputFileName} Final file name (after all processing)
- {OutputFileNameWithoutExtension} Final file name without its extension (after all processing)
- {OutputFileNameExtension} Final file extension (after all processing, ex: .jpg)
- {OutputFileDirectoryPath} Path of the directory containing the final file (after all processing)
- {OriginalFilePath} Original file path
- {OriginalFileName} Original file name
- {OriginalFileNameWithoutExtension} Original file name without its extension
- {OriginalFileNameExtension} Original file extension (ex: .jpg)
- {OriginalFileDirectoryPath} Path of the directory containign the original file
- {ParamLogFilePath} Log file path (if defined)
- {ParamIsAsync} Is the command running asynchronously or not ?
- {ParamIsAdminMode} Is the command ran with Administrator privileges ?
- {ParamPathDelimiter} The delimiter used to format path in variables
- {EngineLabel} Engine label
- {EngineVersion} Engine version
- {ImageWidth} Image width (in pixel)
- {ImageHeight} Image height (in pixel)
- {ImageHorizontalResolution} Image horizontal resolution (in dpi)
- {ImageVerticalResolution} Image vertical resolution (in dpi)
- {ImageFrameCount} Image frame count
- {ImageMetaAuthors} Image autothors (if available)
- {ImageMetaCameraMaker} Camera maker (if available)
- {ImageMetaCameraModel} Camera model (if available)
- {ImageMetaComment} Image comment (if available)
- {ImageMetaCopyright} Image copyright (if available)
- {ImageMetaKeywords} Image keywords (if available)
- {ImageMetaRating} Image rating (if available)
- {ImageMetaSubject} Image subject (if available)
- {ImageMetaTitle} Image title (if available)
- {ImageMetaExposureTime} Image exposure time (if available)
- {ImageMetaFNumber} Image aperture value (if available)
- {ImageMetaFocalLength} Image focal length (if available)
- {ImageMetaIsoSpeed} Image ISO speed (if available)
- {ImageMetaProgramMode} Program mode (if available)
- {ImageMetaGpsLatitude} GPS latitude (if available)
- {ImageMetaGpsLongitude} GPS Longitude (if available)
All about event commands
Event commands essentially work like custom commands and have the same options.
The difference is that they are only launched a single time and they can take the list of all the files to process as a parameter.
In this section we're going to learn where to find them and how to configure their options.
Activating an event command
For now, there are two possible events for event commands:
- "Before the processing" which is executed just before the first action begins on the first file.
- "After the processing" which is executed once all the files are processed and dropped to their ouput location.
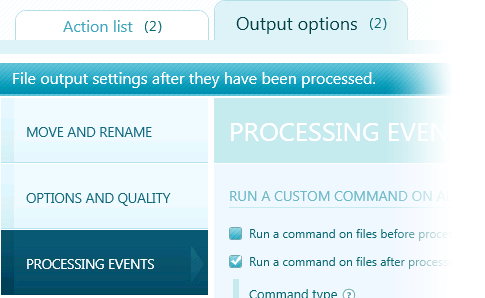
When you are in CoolTweak menu editor, event commands can be found and activated from the "Output options" tab of any menu, under the "Processing events" category.
Check the option corresponding to the event on which you want to subscribe to activate it and display its settings.
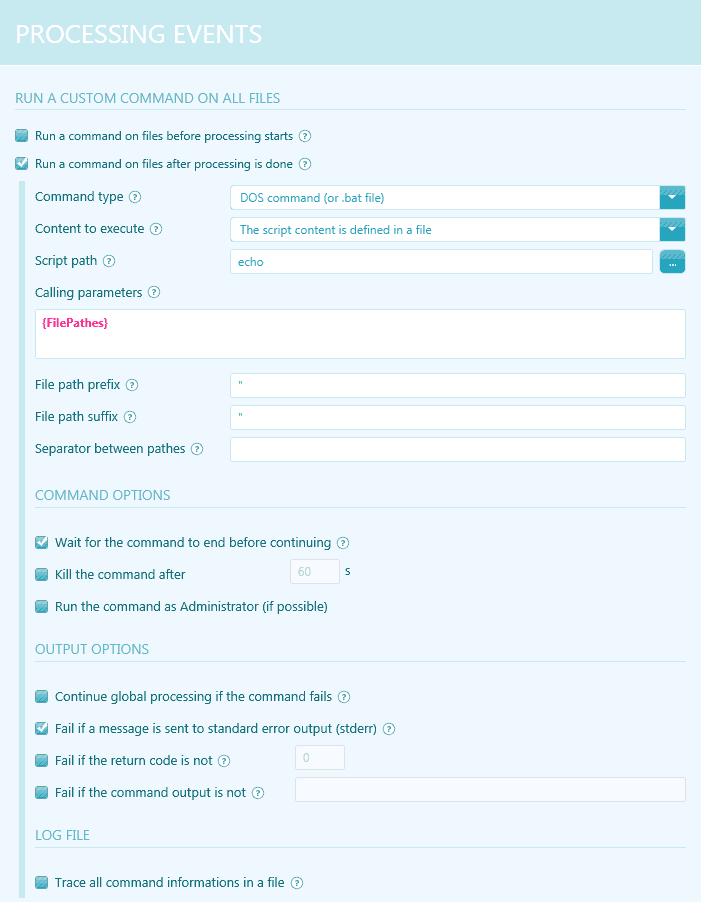
The configuration options of event commands are very similar to custom commands ones.
There are just a few additional possibilities to control the way file pathes are rendered when they come from variables parameters.
In this example, the provided parameter will be the {FilePathes} variable representing the list of all the pathes of the files to process.
-
File path prefix
A prefix is a custom string that will be placed before the path of every file.
-
File path suffix
A suffix is a custom string that will be placed after the path of every file.
-
Separator between pathes
A separator is a custom string that will be placed between two file pathes.
-
Some examples for a better understanding
Let's assume you're processing 2 files: file1.jpg and file2.jpg:
If prefix = " (double quotes) and you let suffix and separator empty:
{FilePathes} = "file1.jpg"file2.jpgSi suffixe = " (double quotes) and you let prefix and separator empty:
{FilePathes} = file1.jpg"file2.jpg"Si séparateur = , (comma) and you let prefix and suffix empty:
{FilePathes} = file1.jpg,file2.jpgIf prefix = " (double quotes), suffix = " (double quotes) and separator = , (comma):
{FilePathes} = "file1.jpg","file2.jpg"If prefix = %, suffix = $ and separator = *:
{FilePathes} = %file1.jpg$*%file2.jpg$
Event command variables
The parameters provided to your command are essential because they allow to specify which files to process and other informations about the execution.
CoolTweak offers a large range of predefined variables (also called macros) with the {MyVariable} notation which are replace by their actual value just before running the command.
Click the calling parameters field to display all the available variables.
- {FilePathes} Full pathes of all files to process
- {FileCount} The total number of files to be processed
- {FileDirectoryPathes} Pathes of all the directories containing the files to process
- {FileDirectoryCount} The number of distinct parent directories
- {EngineLabel} Engine label
- {EngineVersion} Engine version
- {ParamLogFilePath} Log file path (if defined)
- {ParamIsAsync} Is the command running asynchronously or not ?
- {ParamIsAdminMode} Is the command ran with Administrator privileges ?
- {ParamPathDelimiter} The delimiter used to format path in variables
- {ParamPathPrefix} The text to add before every file path
- {ParamPathSuffix} The text to add after every file path
- {ParamPathSeparator} The text to add between two file's pathes
Now game's on, it's up to you !
That's it, you know everything about how you can run your own actions from CoolTweak, it's up to you to automate your processing and to build your ideal toolbox.
CoolTweak loves developers, don't hesitate a second to send your suggestions or remarks to improve custom commands, all the ideas are always really welcome.
To carry on this little tour and maybe find inspiration, read the articles about embedding popular third party libraries with very practical examples..